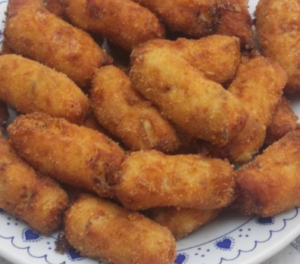
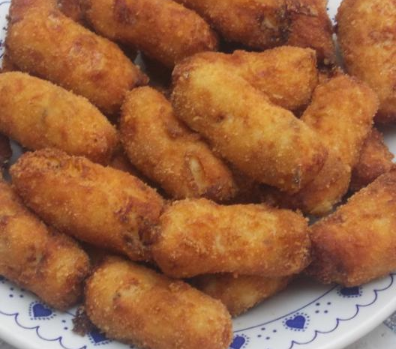
This is one of the most complete recipes you will find to make croquettes with Thermo mix, you will see that it has many steps but the final result is simply spectacular.
Contents
We explain step by step how to make the croquettes so that you can change them to your liking and make them with the flavors that you like the most.

Ingredients to make homemade Croquettes with Thermo mix:
- 50 grams of butter
- 80 grams of olive oil
- ¾ cup chopped onion
- 1 handful of parsley
- 1 clove garlic
- 120 grams of flour
- 550 grams of milk
- 5 cups of Filling to taste
- 2 units of boiled egg
- 1 pinch of salt
- 1 pinch of white pepper
- 1 pinch of Nutmeg
How to make homemade Croquettes with Thermo mix:
- If the croquettes are going to be Serrano ham, cut it in the Thermo mix, taking the speed control to the top. If the ham is introduced into the machine in large pieces, before proceeding to chop it, press the turbo button 3 or 4 times to reduce the size of the pieces. Remove it by slicing the glass well and reserve it.
- If it is York ham or pork shoulder, these can be cut at speed 3 and ½ or even at maximum speed, but only in a matter of seconds, back and forth. If it is a softer ingredient, prawns, fish, cod, cut it at speed 3 and 1/2 but very carefully, that is, bring the speed control up to that number, for a second and stop the machine to see how has been the chopping.
- If it is necessary to repeat this operation, because the chopping has been insufficient, do it, but it is preferable to take a little longer, especially at the beginning until you become familiar with the machine, than to obtain a porridge-like chop.
- When you have the main filling ready, chop the boiled eggs back and forth from 1 to 3 and a half times a couple of times or until you check that they are to our liking. Once chopped, remove them and reserve them together with the previous chopped.
- Pour the oil, butter and onion into the same glass of the Thermo mix without washing. Program at speed 5, 100º temperature and 5 minutes or something more, depending on the amount of onion that we have put.
- Next, add the flour and fry it programming at speed 4 for 7-9 minutes and now at a temperature of 90ºC. Instead of 100º as before. In this way, we will prevent the flour from sticking to the walls of the glass.
- Before proceeding to scrub it, pour about a liter of water into the Thermo mix glass and beat it for 15 or 20 seconds at maximum speed so that the force of the water, with such a high speed, removes all the béchamel sauce that has remained in the lid and in the glass.
- If we are making the first recipe for croquettes, that is, the 120 g of flour, the frying time of this will be somewhat less, with 5 minutes it will be enough so that the flour does not taste raw afterwards.
- When the flour is already fried, lower everything that has been stuck to the walls and add the milk, salt, white pepper and nutmeg.
- Program a temperature of 100ºC, speed 4 and a time that will be totally random as we will see now, as it may vary depending on the initial temperature of the milk and many other factors. To put it, we are going to program 10 minutes but knowing that we are going to have a lot of time left over.
- As the dough thickens, the noise of the machine becomes deafer and if we lift the cup we will see that the dough moves on its surface more and more slowly.
- When we see that the dough no longer splashes, because it has begun to thicken, remove the cup from its place and instead insert the brown spatula into the glass. When said spatula stops completely, that is, it stops turning, the dough will be finished. Then add everything that we had chopped, the ham and the hard-boiled eggs, for example.
- This chopped can be mixed in the same Thermo mix glass, but if we have made a large amount of pasta, the second or third recipe, it is more convenient to mix the béchamel with the chunks in the same container where we are going to cool it.
- Let the dough rest in a large enough container. The container must remain covered with the hot dough and as soon as it is at room temperature it will be stored in the refrigerator until the next day.
- To prepare the croquettes, in a large and somewhat deep dish place the beaten egg lightly seasoned with salt and freshly ground white pepper. In another large bowl put the breadcrumbs.
- Trick: If you prefer, you can coat them with the mixture of breadcrumbs, garlic and parsley, which is what is called “Provencal bread” and it cooks wonderfully in the machine.
- With an ice cream spoon, take several portions of croquette paste one by one and pour them into the plate with the beaten egg. When we have already added, for example, 3 or 4, without touching them at all with our hands, turn them over with the help of a fork so that they are covered with egg everywhere.
- Now, with this same fork, remove them from the egg, draining them well and pour them into the bowl where the breadcrumbs are.
- Tip: When the 3 or 4 balls are already inside the bowl, move it slightly back and forth so that all these portions of croquette dough are well wrapped in bread or bread mixture.
- When they are well coated everywhere, take them out by hand and roll each portion between the palms of your hands so that this kind of ball takes on the elongated shape of the croquette.
- When you have them all ready, you can fry the croquettes in olive oil, as this spreads more in the pan and the croquettes also come out completely drained. The oil should be hot and slightly smoking, around 160ºC.
- Although they come out much drained, remove them with a wire skimmer and place those on absorbent kitchen paper so that it absorbs the drops of oil that fall from the skimmer.
- Enjoy the homemade croquettes with Thermo mix and make them with the flavors that you like the most.
- Preservation of croquettes
- The croquettes can be preserved in several ways if they are well packaged. The croquette paste as it comes out of the Thermo mix, if it is well stored in an airtight container, it keeps well in the fridge for 2 or 3 days. You can also freeze them as they are, but to freeze them, I prefer to mold them first because now they form better.
- They can also be fried and frozen once fried, something that many people ignore. To do this, you have to fry them well so that they do not drop and remain squashed when they cool down.
- To eat them, thaw them at room temperature in a few minutes and heat them carefully in the microwave at 400 or 500 watts, or thaw and heat them directly in the microwave.
- Do not spend time because they would break and dry out. If done correctly they are as good as if they were just fried.


